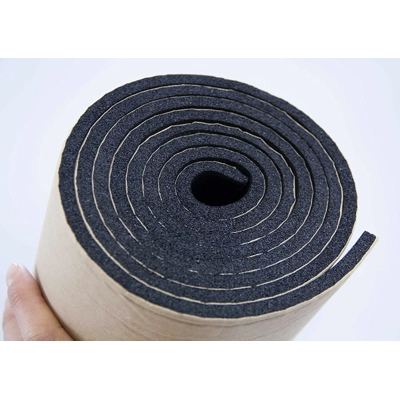
Sound Deadening Installation
How to Install Car Sound Deadening & Car Sound Insulation Products 
"How to fit car sound deadening?", "How to install car sound deadening products?" and "how to apply car sound insulation materials?"
On this page we have tried to outline how you can install car sound deadening products in your car with ease and efficiency. We have created a step-by-step guide to fitting car sound deadening within the boot of a car, however this process can be applied whether you are fitting car sound deadening to your doors, roof or floor of your car.
When creating this page we stripped out the boot of an Infiniti Q60RS intent on reducing the drone of the rear tyres and twin exhausts. We hope you like it and can apply this car sound deadening installation advice to your build. 
Once you have selected, ordered and received the best car sound deadening products for the application, it is time to check and prepare for installation.
We started with a fully built Infiniti Q60RS boot area which was in need of car sound deadening & insulation products , this would be very similar to any mid sized boot area. Also the fitment method and staged approach would be almost identical to any make or model. Most car manufacturers do not apply much car sound deadening to the rear end and usually this is the most common noise complaint with new and used cars.
1) Before applying your car sound deadening products, start by removing the trim panels from the boot. These usually include the boot load board, wheel arch side panels and spare wheel or spare wheel well.
You can use a trim panel removal tool to do this.
If you find any difficult areas to remove, you can search in "youtube" for your specific make and model on how to do this. Usually you can find a video tutorial.
2) Before you can apply your car sound deadening you need to prepare the surfaces for your car sound deadening insulation to bond to.
Firstly prepare your suface by removing any debry or old insulation
You need to clean your surface with a panel wipe or alcohol cleaner use a clean cloth for this process.

3) Now you are ready to apply your car sound deadening insulation
Apply your car sound deadening starting from the left side of the boot working way to the right side apply in large peices.
Then apply this to wheel arches and wheel well working centre outwards.

CLICK HERE TO BUY PEACEMAT XR ROLLS
4) How to do corners and fitting of your car sound deadening to wheel arches.
To apply your car sound deadening to wheel arches in the corners can be tricky so to help cut a slice shape into your product on the fold line of your rear wheel arches.

5) How to bond your car sound deadening to your car boot
To bond your car sound deadening to your car you need to apply pressure to the product to do this use the centre cardboard roll from your product and firmly push the edge of the roll, applying pressure all over your car sound deadening.

6) Final layer of car sound deadening before re-fitting trims
Your absorbing material is great to put into the cavities that you cannot get your car sound deadening material in, simply just cut a section off and push into cavity.
Next lay a large peice of material on the boot area and with a marker draw the shape of your boot onto product so you can easily cut the shape out with scissors.

CLICK HERE TO BUY ABSOFT 25MM INSULATION
Finally your boot has been completely insulation with car sound deadening and absorbing material. You are now ready to re-fit your carpet and trim panels

We are confident you will be really pleased with your car sound deadening install! The results of this install were incredible! A huge reduction in exhaust drone and rear road noise, incredibly quiet.... Now it is time to install car sound deadening and insulation to the doors and front wheel arches!


